

Film assistant
Composite a shot in After Effects
Put your elements into your background plate in After Effects: clean keys, matched light and color, haze, focus, motion blur and grain, all live in a new comp.
Runs in After Effects on your computer
- Best for
- Green screen shots, set extensions and adding elements to live action footage.
- Runs in
- After Effects 25.0 or later
- Time
- 20 to 40 min
- Cost
- The work in After Effects is free. NOLGIA generation inside it is priced as usual.
Already have an account? Sign in
Create a free account and NOLGIA Agent opens with this preset. It works in After Effects through the NOLGIA plugin.
Start it from your agent
Paste this into Claude Code, Claude Desktop, Cursor or any agent with NOLGIA connected, with After Effects open. The agent follows NOLGIA's workflow for this preset step by step, and asks before it changes anything big.
Use NOLGIA to composite my shot in After Effects: key and place my elements into the background plate, match light, atmosphere, depth of field, motion blur and grain, and give me a preview and an editable project.
In Claude Code it is also a command: /mcp__nolgia__after-effects-shot-composer. Open in Claude needs NOLGIA added to Claude as a connector.
What it does
Give the NOLGIA assistant your background plate and the elements that belong in it, and it composites the shot in your open After Effects project. It keys green or blue screen takes, places each element at the right size with its feet on the ground, follows a moving camera, and matches the plate's light, color, haze, focus, motion blur and grain so the shot reads as one photograph.
Everything is built live in a new comp named after your plate, with every effect and mask still adjustable. Your own comps and footage stay as they are, and a safety copy of your project is saved before anything changes. When it is done you get a preview in your NOLGIA library, and a breakdown video if you want one.
You need After Effects 2025 or later and NOLGIA for Adobe. The work in After Effects is free. If the shot needs something After Effects cannot build, like a sky or a background element, the assistant can make it with NOLGIA, priced as usual, and tells you the cost first.
Use cases
- An actor shot on green screen placed into a location plate
- Adding smoke, rain or a new sky to a live action shot
- Extending a set with a generated background for a short film
The workflow
The written steps your agent follows in After Effects, the same for every agent: the rules every After Effects workflow keeps (a safety copy first, everything stays editable, a preview after each change), then this preset's own steps.
Read the workflow
Rules for every After Effects workflow
These instructions are served to the agent with every After Effects preset in the Film assistant category. The agent works through the NOLGIA Bridge tools (nolgia_app_*) on After Effects running on the person's own computer. Code for nolgia_app_run is ExtendScript.
Before anything changes
- Call
nolgia_app_status. If After Effects is not listed, stop and tell the person in two lines: install NOLGIA for Adobe from nolgia.ai/plugins, then open Window > Extensions > NOLGIA in After Effects and sign in. Do not guess or continue without it. - Call
nolgia_app_info. Read what is really open: the project file and whether it has unsaved changes, the active comp (size, frame rate, frames, layers with their types and effects) and the other comps. Describe it back in one sentence so the person can correct you. - If the project has a path, make a safety copy first with
nolgia_app_exportformataep(it copies the project as last saved, next to it, and never overwrites a file). If there are unsaved changes, ask the person to save first (or save withnolgia_app_saveonce they agree). If the project was never saved, ask where to save it and save withnolgia_app_savepath. - Ask only the questions the workflow lists. Offer a sensible default for each so the person can just say "go".
While working
- Work in small steps: one
nolgia_app_runper logical step, each returning a short summary inresult(comp names, layer names and indexes, frame ranges). Each run is one undo step in After Effects. - Never delete, rename, move or re-time the person's existing comps, layers or footage unless they asked. Build in a new comp named after the workflow (for example
NOLGIA Shot 010 comp) that uses their footage as layers, and put every item you add in a project folder named after the workflow. - Keep everything editable: effects stay live with their controls, masks stay masks, tracking stays as keyframes or expressions. No pre-rendering or "Convert to Layered Comp" unless the workflow says so.
- After each visible change, call
nolgia_app_preview(withcompandframe) and look at the image before moving on. If it looks wrong, fix it before the next step. Do not describe a result you have not seen. - Renders run on the person's computer:
nolgia_app_exportmp4renders the comp through the render queue (H.264) and can take minutes. If a tool hands back acommand_id, follow it withnolgia_app_commandinstead of starting it again. - If code fails, read the error (it names the line and shows it), fix the code and try once more. After two failures on the same step, explain what failed in plain words and ask how to proceed.
ExtendScript that bites (After Effects)
- It is ES3: no
let,const, arrow functions, template strings,Array.prototype.indexOf,maporforEach, and noJSONobject. Words ES3 reserves (short,int,class,char,final,native...) cannot be variable names. Return data by settingresult(or as the last expression); the plugin turns it into JSON. - Collections count from 1:
app.project.item(1),comp.layer(1)(the top layer). Adding a layer puts it at index 1 and shifts every other index, so keep references to layers, not their numbers. app.project.activeItemis only the comp in the viewer. Open a comp withcomp.openInViewer()before relying on it, or find comps by name.- Times are seconds. Frame n of a comp is
n / comp.frameRate; the plugin'sframearguments count from 0 at the comp's first frame, whatever its start timecode. - Add effects and reach properties by match name, never by display name, which changes with the app's language:
layer.property("ADBE Effect Parade") .addProperty("ADBE Gaussian Blur 2"),layer.property("ADBE Transform Group") .property("ADBE Position"). Do not guess match names:app.effectslists every installed effect'sdisplayNameandmatchName(Keylight is"Keylight 906", Match Grain"VISINF Grain Duplication", CC Rainfall"CSRainfall"). An effect's parameters are reached by index or by their own match names; list them once (effect.property(i).name) before setting them. - Popup (menu) parameters count from 1. Some values (custom ones such as histograms) throw when read or turned into text: read only what you need.
- Adding, removing or moving an effect (
addProperty,remove,moveTo) makes existing references to the effects on that layer invalid ("Object is invalid"), and every line after that fails: get them again by name or match name after each change. - Mask vertices are in the layer's own pixels, not the comp's: on a scaled or moved layer, convert the comp points first, and on a flipped layer (negative scale) mirror them.
- Track mattes can point at any layer:
layer.setTrackMatte(matteLayer, TrackMatteType.LUMA)(orALPHA), and the matte layer is switched off for you.comp.layers.precompose(indices, name, true)moves layers into a new comp and leaves one layer in their place. - A step that fails halfway keeps what it changed before the error. Write steps so they can run twice (find the layer or effect before adding it again).
- Menu commands (
app.executeCommand(app.findMenuCommandId("...")), for layer styles and the like) act on the selected layers and need the comp open in the viewer (comp.openInViewer()). - A property with keyframes ignores
setValue; usesetValueAtTimeor remove the keyframes first. After setting an expression, readprop.expressionError: an empty string means it works. - Solids made with
layers.addSolidland in the project's Solids folder; footage fromnolgia_app_importlands inNOLGIA imports. - The 3D Camera Tracker, Warp Stabilizer and Content-Aware Fill analyse in the app, but their buttons (Create Camera, Track, Generate Fill Layer) cannot be pressed from a script. Set the effect up, then ask the person to press the button and tell you when it is done.
- A modal dialog in After Effects (a warning at start up, a missing font) holds every script until someone closes it. If a command sits in
runningfor no reason, ask the person to look at After Effects.
Using NOLGIA where it helps
- A missing element (a sky, a background plate, a prop, an atmospheric layer): make a still with
nolgia_text_to_imageor a short clip withnolgia_text_to_video/ image to video, then bring it in withnolgia_app_import. For an element that needs a clean edge, generate it on a plain background and cut it out withremove-background. - These generations cost credits: say what you are about to make and roughly what it costs (read it from the tool's estimate) before you run it, and make it only when After Effects cannot build it (procedural fog, rain, glows and grain are free). Work in After Effects itself is free.
Finishing
- Save the project (
nolgia_app_save), never over a different file. - Export a preview with
nolgia_app_export(mp4of the finished comp, orpngfor a still) so the person has it in their NOLGIA library, and show a still. - Tell the person, in a few lines: what you built, where it lives (comp and folder names), the one or two controls they are most likely to adjust and where those are, and the path of the safety copy.
Composite a shot in After Effects
Put the person's elements into their background plate so the shot reads as one photograph: clean keys, elements that sit on the ground and follow the camera, matching light and colour, the same haze, focus, motion blur and grain as the plate. Everything stays live in a new comp, so they can keep adjusting it.
Ask
- Which item is the plate, and which are the elements to put in it? (Default: the longest footage in the active comp or project is the plate; the other footage and stills are elements.) Look at a frame of each with
nolgia_app_previewbefore asking, and name what you see. - What should the shot look like when it is done: a reference image, a film or show, or a few words? (Default: match the plate as it is, no new grade.)
- For each element: where does it go and how big is it (feet on the ground by the car, far in the background, above the rooftops)? (Default: a sensible place you describe back before building.)
- Is anything missing that the shot needs (a sky, smoke, a background element)? Offer to build it in After Effects for free when it can be procedural (fog, rain, glow, grain), or to generate it with NOLGIA, with the credit cost, when it cannot.
Build
- A new comp over the plate. Make
NOLGIA <plate name> compwith the plate's size, pixel aspect, frame rate and duration (items.addComp), put the plate at the bottom, and put everything you add in a project folderNOLGIA Shot Composer. The person's own comps stay as they are. - Read the plate first. Preview three frames (start, middle, end) and write down: where the light comes from and how hard it is, the colour of the shadows and of the brightest areas, how deep the blacks go at each distance (haze lifts them), what is in focus, whether the camera moves (compare the same feature on the first and last frame), and whether moving things are blurred. Every later step matches these notes.
- Key. For an element shot on green or blue: Keylight (
"Keylight 906"; its parameters are"Keylight 906-0004"Screen Colour,-0005Screen Gain,-0012Clip Black,-0013Clip White,-0018Screen Despot White,-0002View, where 5 is Screen Matte, 10 Intermediate Result and 11 Final Result). Set Screen Colour from the backing right beside the subject (read it from a preview of the take; a lit backing varies a lot across the frame), Screen Gain around 100 to 110, then view the Screen Matte and move Clip Black up and Clip White down until the backing is solid black and the subject solid white; glossy or dark costume needs Clip White well below 100 (around 40 to 50 is common). Check the matte on three frames: add a temporary"ADBE Shift Channels"that takes red, green and blue from alpha (value 9) and preview. When one key cannot give both a soft edge and a solid core: - A garbage mask that follows the subject: trace the silhouette from previews of the Screen Matte every 15 frames, 20 px outside it, as mask path keyframes.
- Split the key into layers of the same take, each with its own mask: a feet layer below the ankles with a second Keylight picked from the lit floor, and the body above them.
- Add a fill layer under the body: the same key set hard, its holes closed with
"ADBE Matte Choker"(Choke 1 about -110, Choke 2 about 110), then choked 6 px. A closed matte grows past the edge and brings back a halo of backing colour, so set this layer's garbage mask to a Mask Expansion of about -14 px, which keeps the fill just inside the outline. Then precompose the key layers (comp.layers.precompose(indices, name, true)) so choke, spill, grade and grain are set once, on the precomp, with"ADBE Simple Choker"about 1.5 px. An element with its own alpha skips all this; a still fromremove-backgroundneeds only the choker. - Remove the spill, keep the costume's colour. Advanced Spill Suppressor (
"ADBE Spill2") on the precomp with Method set to Ultra (parameter 1 = 2), Key Color (parameter 4) the backing colour and Tolerance (parameter 5) about 50: it clears green bounce from shoes and dark cloth and leaves yellow and orange alone. The Standard method turns yellow orange, and widening Spill Range or Tolerance to clear an edge halo greys a yellow costume; fix a halo in the matte (step 3) instead. Measure the hue of any saturated costume colour in the take and in the composite (median hue of its pixels from previews); they must stay within about 3 degrees, and say so. - Place it. Put the anchor point at the contact point (the feet), then scale and position so the size fits the plate's perspective (a person is about 1.7 m: compare with doors, curbs, other people at the same depth) and the feet sit on the ground line. Scaling and moving the plate instead is fine when the element is full frame: it keeps the element sharp. Leave room below the feet for the shadow and for any push-in in the delivery. Match the key light direction. Read where the sun is from the plate's own shadows on the ground (which way they fall, how long they are) and from where the sky is brightest, and decide both left or right and front or behind. A flip (scale x -100) only fixes left and right. When the plate is backlit (the sun ahead of the camera, shadows falling toward it) and the take is lit from the front, keep the take as it is and fix it in step 7: a rim on the sun side and less light on the front.
- Follow the camera. A locked-off plate needs no track. For a moving camera: apply the 3D Camera Tracker or set up Track Motion on the plate and ask the person to press Track (scripts cannot), then parent the element to a null that carries the track. If they cannot, keyframe the element's position and scale by eye every 6 to 12 frames from previews and check the frames in between.
- Match light and colour. Lumetri Color (
"ADBE Lumetri", by index: 15 Temperature, 16 Tint, 17 Saturation, 20 Exposure, 21 Contrast, 22 Highlights, 23 Shadows, 25 Blacks, 41 Faded Film) on the precomp, so its whites, mid tones and blacks fall where the plate's do at the same depth. Measure both from previews rather than guessing. Grade the element toward the plate, never the other way round, and keep it gentle: lifting Blacks, Faded Film, cooling the Temperature and a Saturation cut all push a saturated yellow toward orange and grey (a yellow raincoat turned peach this way), so re-measure the costume hue after the grade and put Saturation back up a little if it dropped. Light wrap, so the plate's light bleeds onto the edges: a compNOLGIA wrap matteholding the element's silhouette filled white with a copy filled black and blurred 15 to 20 px on top (the result is a bright band just inside the edge); over the element, a copy of the plate blurred about 30 px, in Screen at 50 to 70 percent, with that comp as its track matte (wrapLayer.setTrackMatte(matteLayer, TrackMatteType.LUMA)). Backlight rim when the sun is behind or beside the element: take 0.1 to 0.3 stops off its front (Lumetri Exposure) so it sits a little under the backlit plate, then add a rim on the sun side only. The rim matte is a comp holding the silhouette filled white with a copy filled black, blurred 3 to 5 px and moved 6 to 12 px away from the sun, on top: what is left is a band on the edges that face the light. Over the element, a copy of the element brightened and warmed (Lumetri Temperature up, Exposure up about 2 stops, an Exposure effect for more), in Screen, with the rim comp as its luma track matte, so hair strands and knit keep their own texture. Fade it out below the hips with a Linear Wipe (angle 0, feathered) so it stays on hair, shoulders and sleeves and does not draw lines down the legs. Look at it at 100 percent: a sheen, not a glow. For a coloured rim (a neon sign, a sunset behind), an Inner Glow layer style in the light's colour at 20 to 40 percent also works (select the layer with the comp open in the viewer, thenapp.executeCommand(app.findMenuCommandId("Inner Glow")), and setinnerGlow/color,innerGlow/opacity,innerGlow/blurunder"ADBE Layer Styles"). - Ground it. A thin contact shadow right at the soles: a dark solid in the plate's shadow colour with a small, flat, feathered elliptical mask, Multiply at 30 to 45 percent. A big dark ellipse under the feet reads as a blob. Then the cast shadow, falling away from the sun the way the plate's own shadows run: the silhouette (the key precomp, filled with the shadow colour, blurred 6 to 10 px) with its anchor at the soles, flipped and flattened onto the ground (scale y negative), rotated to lean like the nearest plate shadows, Multiply at 35 to 45 percent. A low sun makes it long (scale y about -80 to -90). With the sun behind, it falls toward the camera and runs off the bottom of the frame; what shows is the start of a soft strip from each foot. With the sun to the side, a shorter polygon that fades with a Linear Wipe also works. On wet or shiny ground, a reflection too: a copy of the element flipped at the feet (scale y negative), 30 to 45 percent opacity, Gaussian Blur, a little Turbulent Displace, and a Linear Wipe at 180 degrees so it fades away from the feet.
- Match atmosphere. Haze goes in the grade: lift the element's blacks (Lumetri Blacks) as much as the plate's at the element's own distance, which near the camera is very little. For rain or snow in front of it,
"CSRainfall"(CC Rainfall) on a solid in Screen mode with Composite With Original off; for drifting fog, Fractal Noise in Screen at low opacity. Do not use a Fill effect on the element for haze: on a keyed layer after Lumetri it hid the layer. - Match depth of field. Set the focal plane at the element's feet: the ground around and just in front of the feet must be as sharp as the element, with blur growing with distance behind it and a little toward the camera. Blur the plate, not the element, when the element is the subject:
"ADBE Camera Lens Blur"(1 Blur Radius, 3 Shape, 4 Roundness, 10 Blur Map layer, 12 Placement 2 to stretch the map, 13 Blur Focal Distance, 17 Highlight Gain) with a depth map in the plate's own pixels: a comp holding a Gradient Ramp ("ADBE Ramp") that is black from the feet line (convert the feet's comp position into plate pixels through the plate's scale and position) to 20 to 40 px above it, and white at the horizon, plus a second ramp in Lighten mode that stays black to just below the feet and greys to about 0.3 at the bottom of frame. Put the map comp in the shot, switched off, and pick it as the Blur Map. Then compare sharpness at 100 percent: the element's edges against the ground at its feet. A generated plate is often softer than a keyed take; bring the plate up where the element stands with"ADBE Unsharp Mask"before the blur (2 Amount 60 to 90, 3 Radius about 2; parameter 1 is Color Mode), and take the element down with a 1 to 1.5 px Gaussian Blur so its key edges are no sharper than the plate's lens. Blur an element that is off the focal plane the same way until its edges match plate detail at that distance. - Match motion blur. Elements that move in the comp get layer motion blur on and the comp's motion blur on, with the shutter angle that matches the plate's blur (180 degrees when unsure). Footage with blur already in it stays off.
- Match grain. Match Grain (
"VISINF Grain Duplication": parameter 1 is the Viewing Mode, set 5 for Final Output; parameter 2 the noise source layer, the plate) on each element, or Add Grain ("VISINF Grain Implant") tuned by eye. Grain goes on every element and never on the plate. When the plate was sharpened or blurred in step 10, its own grain changed too: then one Add Grain on theShot gradeadjustment layer over everything (1 Viewing Mode 3 for Final Output, 11 Intensity about 0.5, 12 Size about 0.9) ties the frame together better than grain per element. - Missing layers. Build what can be procedural in After Effects. Generate only what cannot, after saying the cost:
nolgia_text_to_image(about 2 to 8 credits for a still) ornolgia_image_to_video(about 12 to 50 credits for 5 seconds), on a plain background and cut out withremove-background(1 credit) when it needs an edge; bring it in withnolgia_app_import. Then match it like any other element. - Optional unifying grade. Only if the person asked for a look: one adjustment layer on top named
Shot grade(a soft"CS Vignette", CC Vignette, at about 25 is often all it needs).
Check
- Preview the start, middle and end frames at full width (
width1920) and look at the edges: no green or blue fringe, no dark or bright halo, hair and motion edges soft, not chewed. - Blacks and whites of each element must match the plate's at the same depth; the light must come from the same side and the same front or back (a rim on the sun side when the plate is backlit); the element must not float (feet on the ground, the shadow falling the way the plate's shadows fall) and must not slide against the plate between frames.
- Focus: at 100 percent, the ground at the element's feet is as sharp as the element, and softer with distance from there.
- Grain: in a flat area, the element and the plate must look equally noisy.
- Colour: the median hue of the costume's saturated colours in the composite is within about 3 degrees of the take (compare the first frame of the take with a composite frame, side by side), and skin has not turned green or grey.
- If something is off, fix it and preview again before moving on.
Deliver
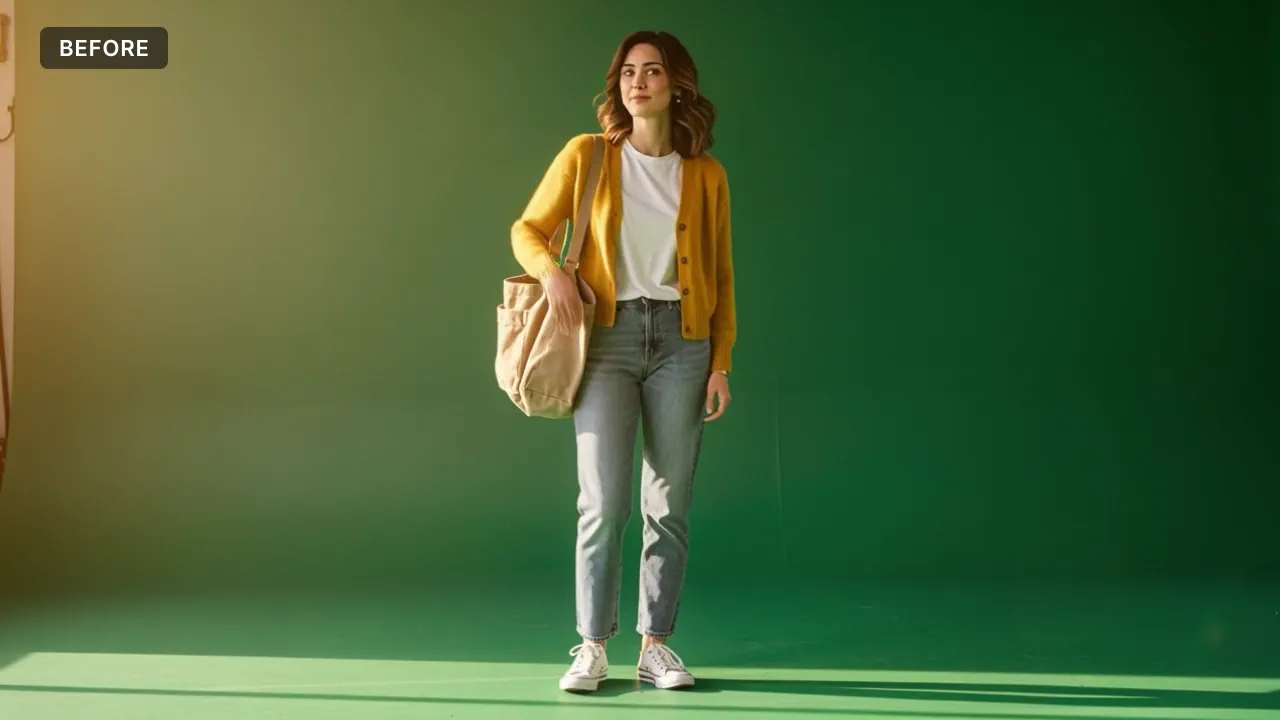
Save the project, export an mp4 of the comp (the whole shot, or a 3 to 5 second range for a long one) and show a still. Offer a before and after too: a comp NOLGIA <plate name> before-after with the raw take over the finished comp, revealed by a mask that sweeps across the frame with a thin line at its edge, small BEFORE and AFTER labels in the top corners, and a slow push-in (a few percent, anchored so the head and the feet with their shadow stay in frame to the last frame), exported as mp4; it shows the work at a glance. The take must sit exactly where it sits in the shot (same flip and position), and a mask on a flipped layer is mirrored. Tell the person: the comp and folder names, the controls they are most likely to adjust (Keylight Screen Gain and Clip values, the colour correction on each element, grain amount, blur radius, rim and light wrap opacity, shadow opacity), and which layers NOLGIA generated and what they cost.
Try it in After Effects.
Install the free NOLGIA plugin for After Effects, sign in, then ask your agent.